

There’s something utterly magical about making your own chocolate Easter eggs at home. I mean, who doesn’t love the idea of crafting delicious treats that not only satisfy your sweet tooth but also let your creativity shine? I remember the first time I attempted to make my own DIY Easter eggs; it was a colorful disaster! I was so excited that I may have overestimated my chocolate melting skills. Let’s just say, the chocolate was more of a gooey mess than a smooth coating. But oh, how rewarding it was to finally open those little eggs and see the colorful surprises inside! Now, I can’t help but smile as I create new designs, experimenting with different colors and sprinkles. This is a fun project that’s perfect for all ages, and the best part? You can customize them however you want! So let’s get started on this delightful journey together!
Ingredients List
Gathering your ingredients is the first step to creating these delightful DIY Easter eggs! Here’s what you’ll need:
- 200g dark chocolate: Choose good quality chocolate for the best taste. I prefer a nice 70% cocoa for a rich flavor!
- 100g white chocolate: This will be used for decorating, so make sure it’s nice and creamy.
- Food coloring: Get creative! Look for gel or liquid food coloring to add vibrant shades to your eggs.
- Sprinkles: Use your favorite types—colorful, chocolate, or even edible glitter for that extra sparkle!
- Egg molds: Silicone molds work best since they make it easy to pop the eggs out without breaking them.
Having everything ready will make the process smoother and more enjoyable. Trust me, you’ll want to dive right into the fun part!
How to Prepare Instructions
Now that you’ve got your ingredients ready, let’s dive into the fun part—making your own DIY chocolate Easter eggs! Follow these steps, and you’ll be amazed at how easy it is!
Step 1: Melt the Dark Chocolate
First things first, we need to melt that delicious dark chocolate! You can do this using either a microwave or a double boiler. If you’re using the microwave, chop the chocolate into small pieces and place it in a microwave-safe bowl. Heat it in 30-second intervals, stirring in between until it’s smooth and melted—this usually takes about 1-2 minutes total. If you prefer the double boiler method, fill a pot with a few inches of water, bring it to a simmer, and place a heatproof bowl on top. Stir the chocolate constantly until it melts beautifully. Just be careful not to get any water in the chocolate; it can cause it to seize up!
Step 2: Coat the Egg Molds
Once your chocolate is melted, it’s time to coat the egg molds! Use a spoon or a small brush to spread an even layer of the melted dark chocolate inside the molds. Make sure to cover every inch, as this is the foundation of your eggs. If you miss any spots, your chocolate eggs could end up being a bit fragile. So take your time here!
Step 3: Chill the Molds
After you’ve coated the molds, pop them in the fridge for about 15 minutes. This chilling time is crucial because it helps the chocolate set and form a solid shell. You want them to be firm enough to hold their shape when you remove them later!
Step 4: Repeat Coating
Once the first layer is set, it’s time for a second coat! Take the molds out of the fridge and repeat the coating process with more melted dark chocolate. This second layer will give your eggs that nice, thick shell we all love. After coating, chill them again for 15 minutes to let everything set perfectly!
Step 5: Remove from Molds
Now comes the exciting part—removing the chocolate eggs from the molds! Gently flex the silicone mold to loosen the edges of the chocolate. Then, carefully push the egg out from the bottom. If they don’t come out easily, don’t force them! Just give them a little more time in the fridge to set or wiggle them a bit more gently.
Step 6: Prepare the White Chocolate
Next, let’s get that white chocolate ready for decorating! Melt it in the same way you melted the dark chocolate—either in the microwave or using a double boiler. Once melted, you can mix in your food coloring to create vibrant shades. Just remember, a little goes a long way, so start with a small amount and add more until you reach your desired color!
Step 7: Decorate the Eggs
Finally, it’s time to let your creativity shine! Drizzle the colored white chocolate over the chocolate eggs and sprinkle on your favorite toppings—think colorful sprinkles, edible glitter, or even crushed candies! Each egg can be a unique masterpiece. Don’t be afraid to experiment; the more fun you have, the better your eggs will look!
Nutritional Information
Now, let’s talk about the nutritional side of our delightful DIY chocolate Easter eggs! While they’re undoubtedly a treat, it’s good to be aware of what you’re indulging in. Here’s the estimated nutritional information per egg:
- Serving Size: 1 egg
- Calories: Approximately 150
- Fat: 9g
- Saturated Fat: 5g
- Unsaturated Fat: 3g
- Trans Fat: 0g
- Sodium: 5mg
- Carbohydrates: 18g
- Fiber: 2g
- Sugar: 10g
- Protein: 2g
- Cholesterol: 0mg
These values are approximate, of course, and can vary depending on the specific brands and ingredients you use. But hey, they’re still a delicious way to celebrate Easter! Enjoy your creations guilt-free, and remember that moderation is key when it comes to all things sweet!
Why You’ll Love This Recipe
- Quick and Easy: You can whip up these chocolate Easter eggs in just about an hour, making them a perfect last-minute treat!
- Fun for Everyone: This is a fantastic family project! Kids and adults alike will enjoy the creative process of making and decorating their own eggs.
- Fully Customizable: You can let your imagination run wild with colors, flavors, and toppings! Each egg can be a unique masterpiece that reflects your style.
- No-Bake Delight: Since there’s no baking involved, you can skip the oven and avoid any heating mishaps. Just melt, mold, and chill!
- Perfect for Celebrations: These DIY Easter eggs make for charming gifts or fun additions to your Easter festivities, bringing smiles all around.
Tips for Success
To ensure your DIY chocolate Easter eggs turn out beautifully, I’ve gathered some handy tips that have helped me along the way. Trust me, these little nuggets of wisdom can make a big difference in your chocolate-making adventure!
Tempering Chocolate for a Glossy Finish
If you want that gorgeous, shiny finish on your chocolate eggs, tempering is the way to go. It sounds fancy, but it’s really just a method of melting and cooling chocolate to stabilize it. Start by melting two-thirds of your chocolate until smooth, then remove it from heat and gradually add the remaining third, stirring until it cools and thickens. This technique keeps your chocolate from getting that dull, chalky look and helps it snap nicely when you bite into it!
Experimenting with Colors and Flavors
Don’t be afraid to play around with different colors and flavors! You can tint your white chocolate with all sorts of food colorings, and if you’re feeling adventurous, try adding a splash of flavored extracts like vanilla or almond to your chocolate for a delightful twist. Just remember, a little extract goes a long way, so start small and taste as you go!
Choosing the Right Toppings
When it comes to sprinkles and toppings, the sky’s the limit! From colorful sprinkles to crushed nuts or even mini chocolate chips, think about what flavors and textures you want to combine. For a fun touch, consider adding some edible glitter for that extra sparkle! Just make sure whatever you choose is safe to eat—better to be cautious when decorating your sweet creations.
Practice Patience
Lastly, don’t rush the process! Letting your chocolate set properly after each step is crucial for making sure your eggs hold their shape and have that satisfying snap. Trust me, it’s worth the wait to avoid any melty mishaps!
With these tips, you’ll be well on your way to creating stunning and delicious DIY chocolate Easter eggs that will impress everyone. Happy decorating!
Storage & Reheating Instructions
Now that you’ve created your delightful DIY chocolate Easter eggs, it’s important to store them properly to keep them fresh and tasty! Here’s how to do it:
First things first, make sure your chocolate eggs are completely set and cooled before storing them. If you’ve made extra eggs (lucky you!), place them in an airtight container. This will help protect them from moisture and keep them nice and fresh. I always line the bottom of the container with a sheet of parchment paper to avoid any sticking!
When it comes to the ideal storage environment, keep your chocolate eggs in a cool, dry place away from direct sunlight. A pantry or cupboard is usually perfect. If your kitchen tends to get warm, you might want to pop them in the fridge, but be cautious! Cold temperatures can cause chocolate to develop a white film called “bloom,” which doesn’t affect the taste but can be a bit of a bummer visually.
If you do store them in the fridge, make sure to let them come back to room temperature before enjoying. This way, you’ll get that lovely chocolate texture back, and they’ll taste even better!
As for reheating? Well, chocolate eggs are meant to be enjoyed as is! If you find yourself with leftover eggs (which, let’s be honest, is a rare occurrence), just follow the storage tips above. You can also use any leftover melted chocolate for drizzling or dipping other treats, so nothing goes to waste!
With these tips, your chocolate Easter eggs will be deliciously preserved for days to come. Enjoy your sweet creations, and happy nibbling!
FAQ Section
Got questions about making your own DIY chocolate Easter eggs? Don’t worry, I’ve got you covered! Here are some common queries that pop up, along with my best tips to help you out:
How do I fix broken chocolate eggs?
Oops! If you find that some of your chocolate eggs have broken, don’t panic! You can melt a bit of chocolate and use it as a glue to stick the pieces back together. Just apply a small amount to the broken edges and hold them together for a minute until they set. If they’re really crumbled, you can also chop up the pieces and use them as a delicious topping for ice cream or brownies!
Can I use alternative fillings in my chocolate eggs?
Absolutely! The fun of DIY chocolate Easter eggs is that you can customize them however you like. Try adding creamy peanut butter, coconut flakes, or even mini marshmallows inside your eggs before sealing them up with chocolate. Just remember to keep any fillings that might melt or ooze to a minimum to ensure your eggs hold their shape!
How can I make dairy-free versions of these chocolate eggs?
If you want to whip up some dairy-free chocolate Easter eggs, it’s super easy! Look for dairy-free dark chocolate or vegan chocolate chips at your local store. They melt just like regular chocolate and taste amazing. You can also use dairy-free white chocolate alternatives for decorating. Just double-check the labels to make sure they’re free from any dairy ingredients!
What if I don’t have egg molds?
No molds? No problem! You can easily use a silicone muffin tray or even a cupcake tin. Just coat the insides well with chocolate, and once set, you can create little chocolate cups. They may not be egg-shaped, but they’ll still be delicious and fun to eat!
How do I prevent the chocolate from blooming?
Great question! Chocolate bloom happens when chocolate is exposed to moisture or fluctuating temperatures. To prevent this, store your chocolate eggs in a cool, dry place and avoid refrigerating them unless necessary. If you do need to refrigerate them, make sure they’re in an airtight container to keep moisture out!
With these tips and tricks, you’re all set to tackle any chocolate Easter egg challenges that come your way. Happy egg-making!
Print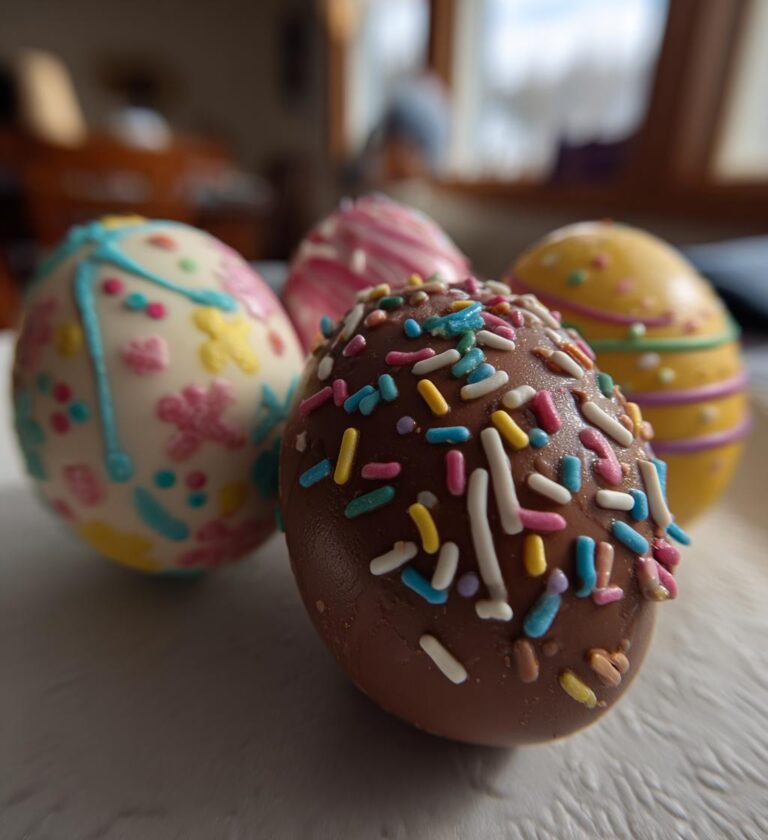
DIY Easter Eggs Chocolate: 7 Magical Steps to Delight
Make your own chocolate Easter eggs at home.
- Total Time: 1 hour
- Yield: 10 eggs 1x
Ingredients
- 200g dark chocolate
- 100g white chocolate
- Food coloring
- Sprinkles
- Egg molds
Instructions
- Melt dark chocolate in a bowl.
- Coat the inside of egg molds with melted chocolate.
- Chill molds in the fridge for 15 minutes.
- Repeat coating for a thicker shell.
- Chill again for 15 minutes.
- Remove from molds carefully.
- Melt white chocolate and mix with food coloring.
- Decorate eggs with colored chocolate and sprinkles.
Notes
- Ensure chocolate is tempered for best results.
- Experiment with different colors and toppings.
- Store eggs in a cool place.
- Prep Time: 30 minutes
- Cook Time: 30 minutes
- Category: Dessert
- Method: No-Bake
- Cuisine: American
- Diet: Vegetarian
Nutrition
- Serving Size: 1 egg
- Calories: 150
- Sugar: 10g
- Sodium: 5mg
- Fat: 9g
- Saturated Fat: 5g
- Unsaturated Fat: 3g
- Trans Fat: 0g
- Carbohydrates: 18g
- Fiber: 2g
- Protein: 2g
- Cholesterol: 0mg
Keywords: diy easter eggs chocolate