
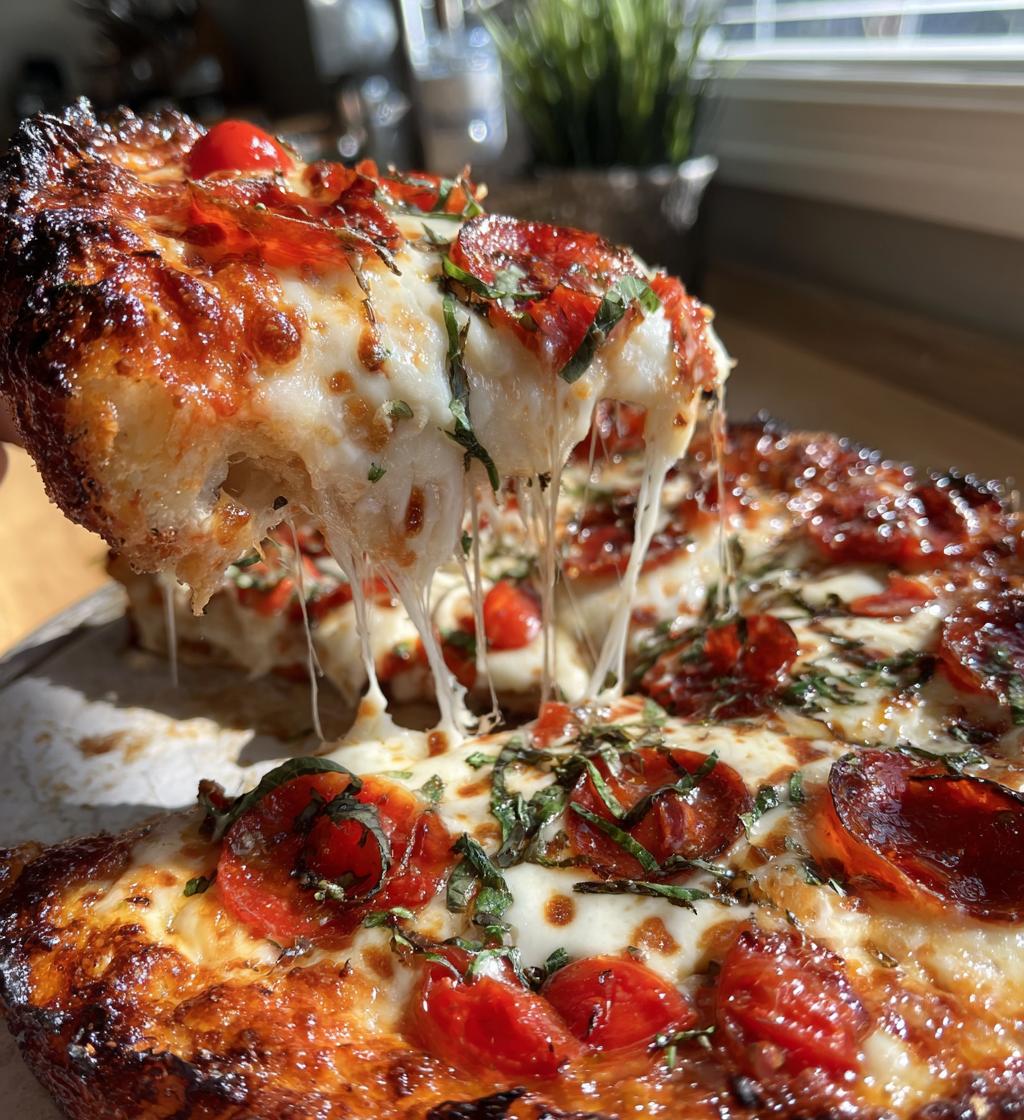
There’s something truly magical about grilling pizza. Imagine that first bite of crispy, smoky crust topped with gooey cheese and your favorite toppings, all made right in your own backyard. It’s like a summer party on a plate! Grilled pizza takes homemade pizza to a whole new level, and I can’t help but get excited every time I fire up the grill. The aroma of the dough sizzling, mingling with the smell of the toppings cooking away, just fills the air with anticipation.
I remember the first time I made grilled pizza with my family. It was a spontaneous summer evening, and we decided to throw caution to the wind and experiment. We rolled out the dough, tossed on some fresh veggies, and watched in awe as it transformed into a delicious masterpiece on the grill. Honestly, it was a game changer! Now, we have grilled pizza nights regularly, each time trying out new combinations. Whether it’s simple pepperoni or a gourmet combo with arugula and prosciutto, the possibilities are endless. Trust me, once you try making grilled pizza at home, you’ll never look at pizza the same way again!
Ingredients List
Here’s everything you’ll need to whip up your very own grilled pizza. These ingredients come together to create a delicious, smoky flavor that will have everyone coming back for seconds!
- 2 cups all-purpose flour: This is the foundation of your pizza dough. It gives the crust that perfect chewy texture.
- 1 packet (2 1/4 tsp) active dry yeast: This little packet is what makes your dough rise and gives it that delightful fluffiness.
- 3/4 cup warm water: The secret to activating the yeast! Make sure it’s warm, but not too hot – think baby-bath temperature.
- 1 tsp sugar: This helps feed the yeast, giving your dough that extra boost to rise beautifully.
- 1 tsp salt: Essential for flavor! It balances out the sweetness and enhances all the other ingredients.
- 1 tbsp olive oil: Adds richness to the dough and helps with that lovely crispy crust.
- 1 cup pizza sauce: Your choice of sauce – whether it’s classic marinara or a zesty BBQ, this is where the flavor begins!
- 2 cups shredded mozzarella cheese: The gooey goodness that melts and holds everything together. You can mix it up with other cheeses too!
- Your choice of toppings: This is where you can get creative! Think pepperoni, fresh veggies, or even gourmet touches like goat cheese or arugula.
Gather these ingredients, and you’ll be well on your way to creating a grilled pizza that rivals your favorite pizzeria! Happy cooking!
How to Prepare Grilled Pizza
Now that you have your ingredients ready, let’s dive into the fun part – making your grilled pizza! I promise, it’s much easier than you think, and the results are absolutely worth it. Follow these steps, and you’ll be flipping pizzas like a pro in no time!
Making the Dough
First things first, let’s get that dough going! In a large mixing bowl, combine the warm water, sugar, and active dry yeast. Give it a gentle stir and let it sit for about 5 minutes until it gets all frothy. This is your yeast waking up and getting ready to work its magic!
Once it’s frothy, add in the all-purpose flour, salt, and olive oil. Mix everything together until a dough starts to form. Don’t worry if it looks a bit shaggy – that’s totally normal! Now, turn it out onto a floured surface and knead it for about 5 minutes. You want it to be smooth and elastic. It’s like giving your dough a little workout!
After kneading, place the dough in a lightly oiled bowl, cover it with a clean kitchen towel, and let it rise for about 1 hour in a warm spot. You’ll know it’s ready when it has doubled in size – this is the perfect time to daydream about all the delicious toppings you’re going to add!
Prepping the Grill
While your dough is rising, it’s time to get the grill ready. Preheat your grill to medium-high heat – around 400°F should do the trick! If you’ve got a pizza stone, now’s the time to place it on the grill to heat up too. It helps to create that crispy crust we all love.
If you don’t have a pizza stone, don’t worry! You can grill directly on the grates, just make sure they’re clean and lightly oiled to prevent sticking. Trust me, a little prep goes a long way in ensuring your pizza doesn’t end up as a sad lump on the grill!
Assembling the Pizza
Once your dough has risen, punch it down gently and turn it out onto a floured surface. Roll it out into your desired shape – whether it’s round, square, or a funky shape that fits your grill! Aim for a thickness of about 1/4 inch for that perfect crispy crust.
Now, it’s time to add the magic! Place the rolled-out dough onto a floured pizza peel or a cutting board. Spread your pizza sauce evenly over the surface, leaving a little space around the edges for that crust. Next, sprinkle on the shredded mozzarella cheese, and then get creative with your toppings! Just remember to not overload it; you want everything to cook evenly.
Grilling the Pizza
Carefully slide your assembled pizza onto the preheated grill. Let it cook for about 2-3 minutes, or until the bottom is puffed and grill marks appear. This is the moment when you want to flip it over! Use tongs or a spatula to flip the dough carefully. Now, quickly add more sauce, cheese, and your toppings on the grilled side.
Close the grill lid and let it cook for another 5-7 minutes. The key here is to keep that lid closed – it helps trap the heat and melt the cheese perfectly! You’ll know it’s done when the cheese is bubbly and golden, and the crust is nicely charred. Remove it from the grill, slice it up, and get ready for a flavor explosion!
And there you have it! Your very own grilled pizza, made right in your backyard. I can’t wait for you to try it – it’s a game changer! Enjoy every bite!
Nutritional Information
When it comes to enjoying grilled pizza, knowing what’s in each slice can help you savor every bite even more! Here’s the estimated nutritional data per serving, which is roughly one slice of your delicious creation. Keep in mind, these values can vary based on your choice of toppings and sauces.
- Calories: 250
- Fat: 10g
- Saturated Fat: 4g
- Unsaturated Fat: 5g
- Trans Fat: 0g
- Cholesterol: 20mg
- Sodium: 400mg
- Carbohydrates: 30g
- Fiber: 2g
- Sugar: 2g
- Protein: 10g
These estimates are based on typical values and can change based on how you customize your grilled pizza. Enjoy your creation knowing you’re indulging in something delicious yet reasonably balanced!
Why You’ll Love This Recipe
Grilled pizza is not just a meal; it’s an experience! Here are some reasons why you’ll fall head over heels for this recipe:
- Quick Preparation: With just 30 minutes from start to finish, you can whip up this delicious dish in no time, making it perfect for those busy weeknights or last-minute gatherings.
- Smoky Flavor: Grilling adds a unique smoky flavor to the crust that you simply can’t replicate in a conventional oven. Each bite is like a taste of summer!
- Customizable Toppings: The sky’s the limit! Whether you’re a meat lover, a veggie enthusiast, or a cheese fanatic, you can tailor your pizza to suit any palate. Get creative!
- Great for Gatherings: Grilled pizza is a fantastic crowd-pleaser. Set up a pizza station and let your friends and family build their own creations. It’s interactive and fun!
- Perfect for Any Occasion: Whether it’s a casual family dinner, a backyard BBQ, or a festive gathering with friends, grilled pizza fits right in and elevates the moment.
Trust me, once you try this grilled pizza, it’ll become a staple in your cooking repertoire! You’ll love the flavors, the fun, and the fantastic memories you’ll create along the way.
Tips for Success
Getting the perfect grilled pizza is all about those little details that make a big difference. Here are my top tips to ensure your pizza turns out absolutely amazing every time!
Mastering Dough Handling
When it comes to working with your dough, a gentle touch is key. Don’t over-knead it – just enough to make it smooth and elastic. If you find your dough is too sticky while rolling it out, don’t hesitate to dust your surface with a little extra flour. This helps keep things from getting messy and ensures a beautiful crust!
Grill Temperature Management
Preheating the grill is non-negotiable! Make sure it’s nice and hot before you toss on that dough. If the grill isn’t hot enough, your pizza could end up soggy instead of crispy. A medium-high heat, around 400°F, is perfect. If you’re using a pizza stone, let it heat up for at least 15 minutes before grilling to get that nice, even cook.
Topping Combinations
Get creative with your toppings, but remember to keep it balanced! Too many toppings can weigh down your pizza and make it difficult to cook evenly. Stick with 3-4 toppings max for the best results. And don’t forget about the cheese! A good layer of mozzarella helps hold everything together. Try mixing different cheeses for added flavor – goat cheese, feta, or even a sprinkle of parmesan can take your pizza to the next level!
Using a Pizza Stone
If you have a pizza stone, absolutely use it! It helps distribute heat evenly and gives that crust a wonderful char. Just remember to place it on the grill while preheating so it’s ready when you slide your pizza on. If you don’t have one, a clean, oiled grill grate works fine – just be extra careful while transferring your pizza.
Timing is Everything
Keep an eye on the clock! The first side of your pizza will only need about 2-3 minutes on the grill, and once you flip it, you’re looking at another 5-7 minutes. It’s tempting to peek, but try to keep the lid closed as much as possible to maintain that heat. You’ll know it’s ready when the cheese is bubbly and the crust is golden brown!
With these tips in your back pocket, you’ll be well on your way to creating grilled pizza perfection. Happy grilling!
Variations on Grilled Pizza
One of the best things about grilled pizza is how versatile it is! You can easily switch up the flavors and styles to suit your mood or impress your guests. Here are some fun variations to get those creative juices flowing!
Unique Sauces to Try
- Pesto: Swap out the traditional pizza sauce for a vibrant pesto base. It adds a fresh, herby flavor that pairs beautifully with grilled veggies and mozzarella.
- BBQ Sauce: For a smoky twist, spread some tangy BBQ sauce on your dough. Top with grilled chicken and red onions for a BBQ chicken pizza that’s sure to be a hit!
- White Sauce: A creamy white sauce made with ricotta, garlic, and herbs makes a delightful change. It’s perfect with spinach and artichokes for a gourmet touch.
Cheese Options
- Goat Cheese: Crumbled goat cheese adds a tangy flavor that works wonders with sweet toppings like caramelized onions or figs.
- Feta Cheese: If you love Mediterranean flavors, sprinkle some feta cheese on top for a salty kick, especially paired with olives and roasted red peppers.
- Four Cheese Blend: Mix things up with a blend of cheeses like mozzarella, cheddar, gouda, and parmesan for a rich, melty experience.
Fun Topping Ideas
- Fresh Veggies: Go wild with seasonal veggies! Try zucchini, bell peppers, or even grilled corn for a colorful and healthy topping.
- Meat Lovers: For those who can’t resist, load your pizza with spicy sausage, pepperoni, and crispy bacon bits for a meaty delight!
- Fruit: Don’t knock it till you try it! Pineapple is classic, but how about fresh arugula and sliced pears with a drizzle of balsamic reduction for a sweet and savory combo?
Whatever your choice, make sure to balance flavors and textures, and most importantly, have fun with it! Grilled pizza is all about creativity, so let your taste buds guide you. Happy experimenting!
Storage & Reheating Instructions
So, you’ve made this amazing grilled pizza and now you’ve got some leftovers? No problem! Storing and reheating grilled pizza is super easy, and I’ve got a few tips to help you maintain that delicious quality.
First things first, let your pizza cool down to room temperature before storing it. This helps prevent condensation, which can make your crust soggy. Once it’s cooled, slice up your pizza into individual pieces for easier storage.
Wrap each slice in plastic wrap or aluminum foil to keep them fresh, or you can place them in an airtight container if you prefer. Just make sure to separate the layers with parchment paper to avoid sticking. Your grilled pizza will stay good in the fridge for about 3-4 days – perfect for those late-night cravings!
When it’s time to enjoy those leftovers, reheating is key to bringing back that crispy crust. I recommend using the oven for the best results. Preheat your oven to 375°F (190°C) and place your pizza slices on a baking sheet. You can add a little sprinkle of water to the pan to create steam, which helps keep the crust from getting too hard. Bake for about 10-15 minutes, or until the cheese is bubbly and the crust is crispy again.
If you’re short on time, the microwave can work in a pinch, but beware – it might make the crust a bit chewy. To help with this, place a microwave-safe cup of water in the microwave with your pizza slice. Heat in 30-second intervals until warmed through, and you’ll retain a bit more moisture.
And there you have it! Simple storage and reheating instructions to keep your grilled pizza as delicious as the first time you made it. Enjoy every cheesy bite!
Your Turn to Enjoy Grilled Pizza!
Now that you’ve got all the tips and tricks to make the perfect grilled pizza, it’s time for you to dive in and create your own delicious masterpiece! I can’t wait to hear about your adventures in grilling. Did you try a unique topping combination? Maybe you had a pizza night with friends? Whatever the story, I’d love to know!
After you’ve made your grilled pizza, please take a moment to share your experience in the comments below. Rate the recipe and let me know what worked well for you and if there’s anything you’d tweak for next time. Your feedback helps others discover this tasty dish and inspires new pizza makers to get creative!
So, gather your ingredients, fire up that grill, and enjoy every flavorful bite of your homemade grilled pizza. Happy grilling, and I can’t wait to read your stories!
Print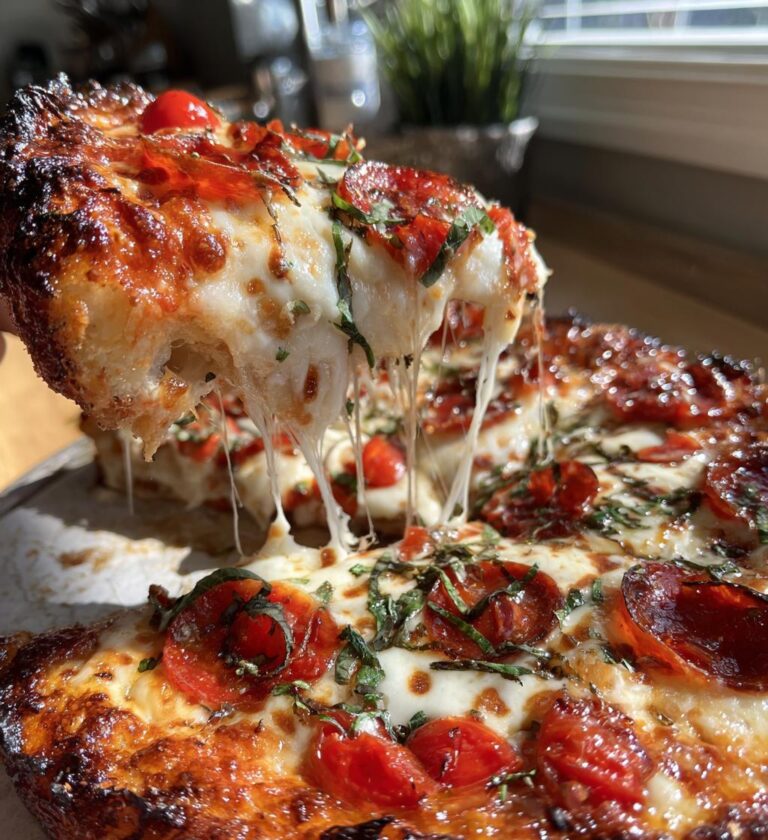
Grilled Pizza: 7 Irresistible Tips for Flavorful Perfection
Grilled pizza is a delicious and easy way to enjoy homemade pizza with a smoky flavor.
- Total Time: 30 minutes
- Yield: 4 servings 1x
Ingredients
- 2 cups all-purpose flour
- 1 packet (2 1/4 tsp) active dry yeast
- 3/4 cup warm water
- 1 tsp sugar
- 1 tsp salt
- 1 tbsp olive oil
- 1 cup pizza sauce
- 2 cups shredded mozzarella cheese
- Your choice of toppings (pepperoni, vegetables, etc.)
Instructions
- In a bowl, mix warm water, sugar, and yeast. Let it sit for 5 minutes.
- Add flour, salt, and olive oil. Mix until a dough forms.
- Knead the dough for 5 minutes until smooth.
- Cover the dough and let it rise for 1 hour.
- Preheat the grill to medium-high heat.
- Roll out the dough on a floured surface.
- Place the dough on the grill and cook for 2-3 minutes until puffed.
- Flip the dough, add sauce, cheese, and toppings.
- Close the grill lid and cook for another 5-7 minutes until cheese melts.
- Remove from grill, slice, and serve.
Notes
- Use a pizza stone for even cooking.
- Experiment with different sauces and toppings.
- Make sure the grill is preheated before adding the dough.
- Prep Time: 15 minutes
- Cook Time: 15 minutes
- Category: Main Dish
- Method: Grilling
- Cuisine: Italian
- Diet: Vegetarian
Nutrition
- Serving Size: 1 slice
- Calories: 250
- Sugar: 2g
- Sodium: 400mg
- Fat: 10g
- Saturated Fat: 4g
- Unsaturated Fat: 5g
- Trans Fat: 0g
- Carbohydrates: 30g
- Fiber: 2g
- Protein: 10g
- Cholesterol: 20mg
Keywords: Grilled Pizza, Homemade Pizza, BBQ Pizza