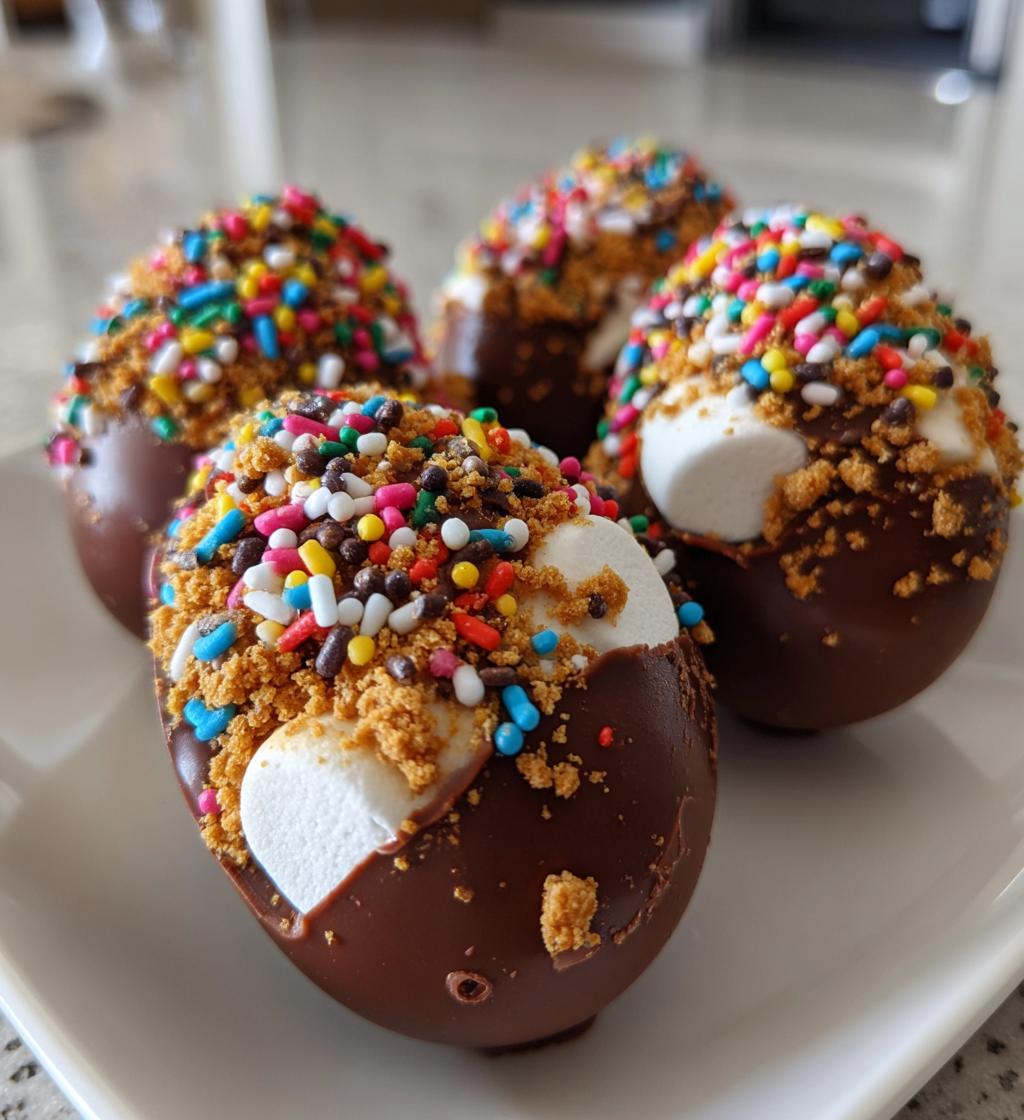
Ah, Easter! A time of joy, celebration, and of course, the sweet, irresistible allure of chocolate. I can’t help but smile as I think of the family traditions surrounding this special holiday. One of my favorites has always been making homemade Easter eggs filled with delicious chocolatey goodness. This delightful treat combines rich dark and creamy milk chocolate with playful mini marshmallows and crunchy graham ers, all shaped into festive egg forms. It’s a no-bake wonder that even the littlest hands can help with! I remember one year, my kids and I had a blast decorating these colorful delights with sprinkles, turning our kitchen into a vibrant workshop of sweets. Trust me, the joy of biting into a homemade Easter egg filled with chocolate and a surprise crunch is a memory you’ll want to create again and again. So, let’s dive into this easy and fun recipe that’ll have everyone hopping with delight!
Ingredients List
To make these delightful Easter eggs, you’ll need just a handful of simple ingredients:
- 200g dark chocolate: Use high-quality chocolate for the richest flavor, chopped into small pieces for easy melting.
- 100g milk chocolate: This brings a creamy sweetness to balance out the dark chocolate, also chopped.
- 50g butter: Unsalted butter is best, as it adds richness without adding saltiness.
- 1 cup mini marshmallows: These fluffy treats add a fun texture and sweetness; no need to chop them!
- 1 cup crushed graham ers: For that delightful crunch, crush the ers into small bits, but not too fine.
- 1/2 cup colorful sprinkles: Choose your favorite sprinkles to add a festive touch on top of the eggs.
How to Prepare Instructions
Now, let’s get to the fun part – making these scrumptious Easter eggs! It’s super simple, and I promise you’ll love every moment. Here’s how to do it:
- Melt the chocolate: Start by breaking up the dark chocolate and placing it along with the butter in a heatproof bowl over a pot of simmering water (that’s called a double boiler!). Stir occasionally until everything is beautifully melted and smooth. This should take about 5-7 minutes. Be careful not to let any water splash into the chocolate – it can ruin the texture!
- Add the milk chocolate: Once the dark chocolate and butter are melted, remove the bowl from heat. Now, stir in the milk chocolate pieces. Keep mixing until it all comes together into a silky, luscious blend. You might want to taste it at this point – yum!
- Mix in the fun stuff: Next, fold in the mini marshmallows and crushed graham ers. This is where the magic happens! Make sure everything is well combined, and the marshmallows are evenly distributed. Don’t be shy; use a spatula to get every last bit mixed nicely!
- Shape the eggs: Now, carefully pour the mixture into your egg-shaped molds. If you don’t have molds, you can shape them by hand, but let’s be honest – the molds make it so much easier and cuter! Make sure to pack the mixture in well to avoid any air pockets.
- Sprinkle it up: Once filled, sprinkle those colorful sprinkles on top like confetti! It’s the best part because it makes them look festive and fun.
- Chill out: Place the filled molds in the refrigerator and let them chill for about 2 hours. This is the hardest part – waiting! But trust me, the results are worth it.
- Time to enjoy: Once they’re set, gently pop the Easter eggs out of the molds. If you shaped them by hand, just roll them into rounds. Now, you can serve them right away or keep them in an airtight container for later (if they last that long!).
And there you have it – a step-by-step guide to creating these delightful Easter eggs filled with chocolate! You’ll be the star of the celebration with these treats, and I can’t wait for you to share them with your loved ones!
Why You’ll Love This Recipe
- Quick & Easy: This no-bake recipe comes together in just 30 minutes, making it perfect for last-minute celebrations.
- Fun for Everyone: Kids love to help with mixing and decorating, turning it into a delightful family activity.
- Irresistible Flavor: The combination of rich dark chocolate and creamy milk chocolate creates a mouthwatering treat that everyone will adore.
- Customizable: Personalize your Easter eggs with different fillings or sprinkles to match your festive theme or family preferences.
- Perfect for Celebrations: These colorful treats are a hit at Easter gatherings, making your dessert table pop with joy!
Tips for Success
To make sure your Easter eggs turn out perfectly every time, here are a few tips I’ve picked up along the way:
- Quality Chocolate Matters: Don’t skimp on the chocolate! Using high-quality dark and milk chocolate makes a huge difference in flavor. Trust me, your taste buds will thank you!
- Be Mindful While Melting: When melting the chocolate, keep the heat low and stir gently. Too much heat can cause the chocolate to seize up – oops! Just be patient, and it’ll melt beautifully.
- Mix Well: Make sure to thoroughly combine the marshmallows and graham ers into the chocolate mixture. Uneven distribution can lead to some eggs being heavy on one side and light on the other.
- Chill Long Enough: Don’t rush the chilling time! Letting the eggs set for a full 2 hours ensures they hold their shape when you pop them out of the molds.
- Experiment: Feel free to get creative! Try adding nuts or different candies to the mix for a unique twist that celebrates your personal touch.
Variations
One of the best things about these delightful Easter eggs is how easily you can customize them to suit your tastes! Here are a few fun ideas to get your creative juices flowing:
- Different Chocolate Combos: Swap the dark chocolate for white chocolate for a sweeter treat! You can even mix and match—try a layer of milk chocolate with a dark chocolate shell.
- Fillings Galore: Get adventurous with the fillings! Add in crushed cookies, peanut butter, or even a layer of caramel for a surprise inside. Each bite can be a new experience!
- Decorate Your Way: While colorful sprinkles are always festive, think about using edible glitter, coconut flakes, or even drizzled chocolate on top for a more gourmet flair.
- Flavor Infusions: Add a teaspoon of vanilla extract, almond extract, or even a pinch of sea salt to elevate the flavor profile. These little touches can make a big difference!
So go ahead, let your imagination run wild with these Easter eggs and chocolate treats! You’ll create something uniquely yours that everyone will love.
Nutritional Information Section
Keep in mind that nutritional values can vary based on the specific ingredients and brands you use. However, here’s a general estimate for one of these delightful Easter eggs:
- Calories: 150
- Fat: 9g
- Protein: 2g
- Carbohydrates: 15g
- Sugar: 10g
- Sodium: 50mg
These sweet treats are a fun indulgence for Easter celebrations, so enjoy them in moderation as part of your festive festivities!
Storage & Reheating Instructions
To keep your delightful Easter eggs and chocolate treats fresh, store any leftovers in an airtight container at room temperature for up to a week. If you live in a warm climate, it’s best to pop them in the fridge to avoid melting! Just make sure to let them come to room temperature before serving for the best texture.
Reheating isn’t necessary for these no-bake treats, but if you want to soften them a bit, you can gently warm them in the microwave for just a few seconds. Be careful not to overheat – we don’t want any melting chocolate disasters!
FAQ Section
Q1: Can I use different types of chocolate for these Easter eggs?
Absolutely! Feel free to experiment with any type of chocolate you love. White chocolate, milk chocolate, or even flavored chocolates like caramel or hazelnut can give you a delightful twist on the classic recipe. Just be mindful of how the flavors will blend together!
Q2: How do I prevent the chocolate from seizing while melting?
To avoid seizing, it’s crucial to keep the heat low and ensure that no water gets into the chocolate. Use a double boiler and stir gently as it melts. If it does seize, you can sometimes rescue it by adding a small amount of vegetable oil to loosen it up.
Q3: Can I add fillings to the Easter eggs?
Yes, definitely! You can get creative with fillings like peanut butter, mini candies, or even fruit preserves. Just make sure to balance the amount so they don’t overpower the chocolate flavor.
Q4: How long do these Easter eggs stay fresh?
Stored properly in an airtight container, these Easter eggs can stay fresh for about a week at room temperature. In warmer climates, it’s best to refrigerate them to prevent melting.
Q5: What should I do if I don’t have egg molds?
No worries! You can shape them by hand into egg shapes, or use any other mold you have on hand, like muffin tins. Just remember to pack the mixture tightly to hold its shape!
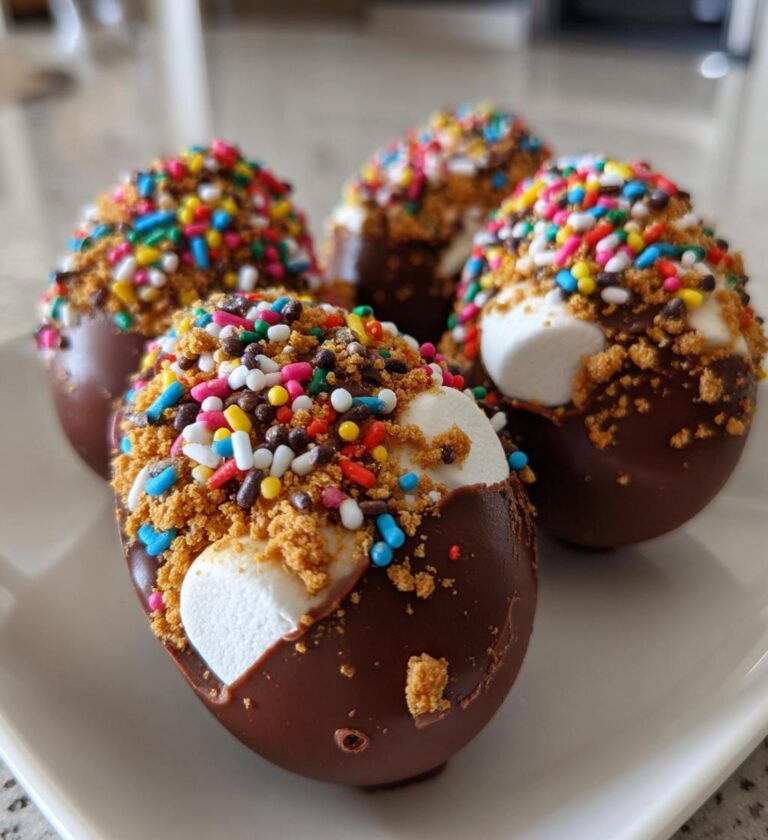
Easter Eggs and Chocolate: 7 Joyful Treats to Make Together
A delightful treat combining chocolate and Easter eggs for a festive celebration.
- Total Time: 2 hours 30 minutes
- Yield: 12 Easter eggs 1x
Ingredients
- 200g dark chocolate
- 100g milk chocolate
- 50g butter
- 1 cup mini marshmallows
- 1 cup crushed graham ers
- 1/2 cup colorful sprinkles
Instructions
- Melt dark chocolate and butter together in a double boiler.
- Stir in milk chocolate until smooth.
- Add mini marshmallows and crushed graham ers to the mixture.
- Mix until well combined.
- Pour the mixture into a mold shaped like Easter eggs.
- Sprinkle colorful sprinkles on top.
- Chill in the refrigerator for 2 hours.
- Once set, remove from the mold and serve.
Notes
- Use any chocolate you prefer.
- Store leftovers in an airtight container.
- Customize with different fillings if desired.
- Prep Time: 30 minutes
- Cook Time: 0 minutes
- Category: Dessert
- Method: No-bake
- Cuisine: American
- Diet: Vegetarian
Nutrition
- Serving Size: 1 egg
- Calories: 150
- Sugar: 10g
- Sodium: 50mg
- Fat: 9g
- Saturated Fat: 5g
- Unsaturated Fat: 3g
- Trans Fat: 0g
- Carbohydrates: 15g
- Fiber: 1g
- Protein: 2g
- Cholesterol: 15mg
Keywords: Easter eggs, chocolate, dessert, festive treats